
Simple Prototyping
In this activity the aim is to produce a ‘rapid prototype’ quickly and easily that simulates the interactive design so that users can use it and give feedback. Because it is a prototype, there is no need to devote time or effort to make the back-end technology work. Where dynamic data is required, such as search results, this can be replaced by static data.
If you find that something is difficult to simulate in the prototype, then it can be left out and its function explained to the user at the point where they encounter it.
To prepare for this activity you need to have explored a design problem such as the one described in Activity 8. You will also need to have explored a few of the prototyping tools introduced earlier in this chapter.
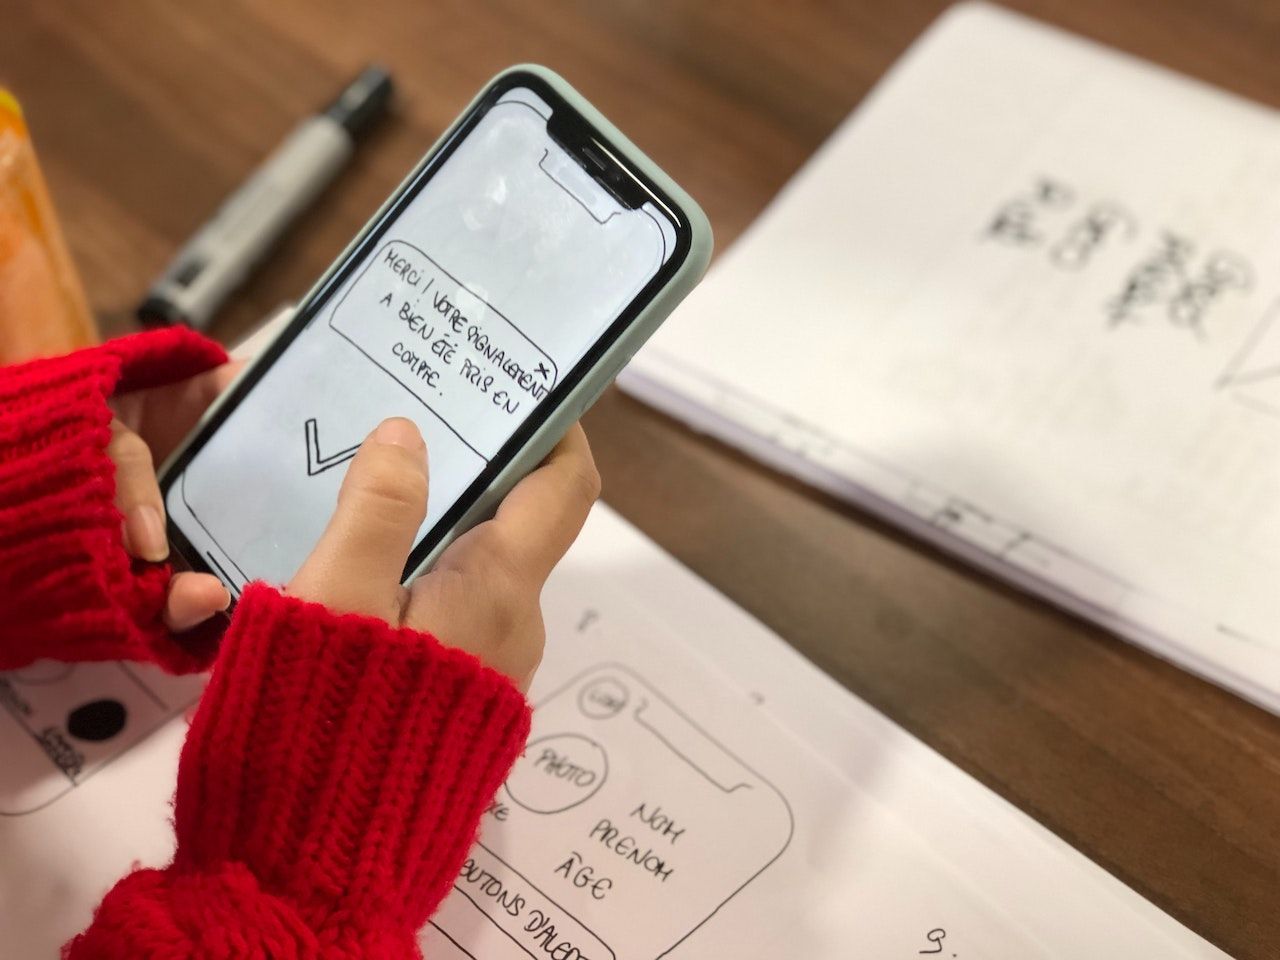 Even hand-drawn interfaces can be tested on smartphones with a camera and appropriate software. Photo: Amélie Mourichon.
If you are sceptical about the benefits of prototyping then we urge you to give it a try. It is a step toward participatory design and for some designers it may seem like relinquishing control. In reality, it will validate the hard work done in researching and specifying the design and save huge amounts of wasted time and money on designs that simply do not work as well as they should.
Design and customising this activity
We have designed this activity so that it can be done using little more than pencil, paper and Scotch Magic Tape. The interface and elements at every stage are sketched on individual pieces of paper or thin card. It may save time to create the elements in software and print them out depending on the complexity of the interactions.
The prototype is made interactive by an assistant who moves the interface elements in and out of the ‘interface’ in response to the actions that the user takes. This is a low-tech approach but has the advantage of being really easy to set up, incredibly flexible and less intimidating for some users. We also think that users are more open with their comments because they can see that the prototype is clearly a work in progress. It is easy to make notes on the interface during a user test and to change the flow of interaction if required.
Digital Prototype
If you would prefer to create a digital prototype, then there are many online tools that do the job. Some simulate the paper prototyping method by simply presenting the interface on a computer screen, with the option to retain a hand-drawn style. They usually include a library of common interface graphics.
More sophisticated prototyping tools include libraries of high-fidelity interface graphics that appear real to the user and offer functions to simulate links and transitions. Some have the additional benefit of being able to run prototype simulations on real devices and for prototypes to be stored in the cloud for remote testing and feedback.
Some would argue that testing an interface design away from the computer allows better communication between the designer and the user. Others may say that it is impossible to simulate sophisticated computer interactions like swiping and contextual menus with paper.
Steps
Preparation
Review your notes and sketches defining the solution that you created in Activity 8. Make a list of each of the interface elements that are needed to build the solution.Revisit the user goals and work through the prototype to review how the user will achieve each goal and make any adjustments that are necessary for the prototype to work as expected.
You will use the prototype to validate the design. For example, the first goal states: ‘To be aware of all relevant opportunities as they arise.’ A solution for this goal could be to design a status indicator that appears at some stage in the user’s interaction. If it has, and the user acknowledges that they have achieved that goal, then no problem! If they continue without understanding the significance of the status indicator then the solution has not been validated.
You may find it useful to write a statement of what constitutes success for each goal and refer to it during user testing.
Make the interface elements
Cut paper or thin card to the same proportions of a typical device display. These do not need to be the same size as the device display and it may help to make them slightly larger to make the process less fiddly. If colour is required, then this can be applied using crayon shading or by using coloured paper. Draw all the interface elements needed on paper (using the list created in Step 1) and cut them out with scissors.Build
Starting with the user’s entry point to the interactive application, position the interface elements and stick them down with magic tape. Consider all user choices available at the entry point and create cards designed to replace the current card for each of the choices that can be made. Alternatively, work at the element level and create a stack of different elements that the assistant can apply to the current card to update it in response to the user’s choice. Continue in this way to build the prototype until it is complete.Try it out
Potential problems in the design of the original solution are revealed and opportunities for simplifying and enhancing the user experience become more obvious; both major benefits of what should be a quick and very low cost technique. When you have confidence in the design it is important to test it with potential users. Depending on the size and the scope of the project, you will need to organize a session with people in the target groups to explore the prototype and validate the design. It is a good idea to record the session because what users say can contain a rich source of clues as to how they are responding to the design. Adjust the prototype as required and repeat!
Outcome
This activity should show that an open and enquiring approach to the initial stages of a project’s development will save time and produce better results.